Background on the car:
2002 325i
Started life as a simple Ebay Coilover'd E46 rescued from a Police Auction. I am going to walk you through the complete build here!
Now onto the swap,
And now I am beginning to test fit the Coyote. So far everything seems like it will work. Upon initial fitment I noticed a few things are going to have to be dealt with:
- 1. OEM Brake Booster is in the way, hitting rear valvecover. Solution is to replace with Chase Bays Booster Delete Kit (already ordered)
- 2. ABS deleted for clearance issues.
- 3. Trimming is necessary on the shielding around the abs unit. This should be minimal, just to help gain clearance for header.
- 4. Steering shaft is going to hit exhaust manifold, so a custom one will be fab'd. I have not decided what design is necessary yet, but will report back.

Steering shaft clearance

Inital test fit (No subframe in at this point, just making sure the engine physically would fit lol )


Have to modify oil pan as expected. Hits subframe.


Continued welding....

Pretty much completed oil pan, i'm not a professional welder, I actually learned TIG welding during this project. Also this pan lasted over the season perfect without any leaks or cracks... however i did dent it lol more on that later.

Some more random pics.
 S
S
Starting to fit the mustang dash.


Oil pan is mounted and test fit, it gained me the clearance I needed!
As you can see, its tight... Really really tight. I slotted the steering column and moved it over about 1/2" to add clearance for the steering shaft. I'm going to probably end up purchasing a slimmer steering shaft and coupler to help buy a few millimeters as well.
Test fit with motor in position with a piece of PVC tubing to just get a rough idea of room on the back cylinder. This had the steering rack and steering shaft in position as well as the motor in it's mounted position. As you can see there is room, but just barely. I have to keep in mind engine movement and steering rotation.
Then for fun, I took the factory passenger side header, flipped it around and cut off the flange to see where that puts me. The photo with the header has the motor a tad higher than it would actually sit because I had to remove the one motor lifting hook to get it to fit.I think it may work with the only issue as the exhaust is now pointed at the front of the car, so I would have to crossover to the passenger side in front of the motor possibly.
The next steps are to trim the factory header a tad more and then hopefully build off that instead of starting from scratch. But we will see once I get further !


Header Building V1:
Driver side header mocked up as well as both engine mounts. I need to connect some of the piping yet obviously (link 7/8 and 5/6) but it's there for space claim. I made my own slim steering shaft as well because the stock one was hitting the driver side mount.
I'll get these fully cut up and see where it sits from there!


Steering Shaft :

Headers V1 with engine mounts V1


Fuel System:
Uses a C5 fuel pressure regulator, Walbro 255 In tank pump to a Radium Engineering Fuel Surge Tank in the trunk area.

Fuel lines the typical red and blue haha


some further dash fitment with bracketry using part of the stock mustang dash supports.

Driveshaft: Shaftmasters.com


Engine back out for billet OPG's and additional header work. Mounted a T56 style clutch reservoir so I have separate brake/clutch reservoirs, added subframe reinforcement to the front and instead of putting them on the inside like normal, I put them on the top to raise my motor slightly because my current clearance from oil pan to power steering rack is very tight. Also started working on more wiring. I need to get some grommets to protect the wiring and I wish it took a picture but it actually got the Ford sync to load in the car on the dash haha.
28 days til event, 25 ish til shakedown hopefully. And 7 days til startup! If I can manage to get the rest of the work done this week.


MMR Oil Pump Gears:


Engine back in, for testing in a few days.
 Radiator and ltr test fit with factory mustang fans! Also got the clutch bled tonight. Brakes and power steering are next. I'm waiting on a couple fittings for the power steering as well as a reservoir tank, I have the power steering pump mounted as well and I need to order a slightly longer supercharger belt because of the pulley size is a little bit bigger than the AC pulley that I replaced

Quick n dirty power steering mount to get to test n tune


Exhaust setup V1 Side exit lol


Chase bays brake booster delete. This is being updated winter of 2021

First event video:

Now this part of the blog is just some photos of the year, until it had its "Blue Phase"


Cage time:
Well the Rollcagecomponents Prebent cage is very nice. Basically all of the tubes have at least one end notched already. you just have to figure out where you want the main hoop to go which adjusts all your other "links" so you have to just cut and notch the rest of them and then weld together.
We made our boxes out of the included plates they gave us but they were not cut out which isn't that big of a deal. I think we're doing a pretty nice job.
I'm very pleased with this purchase it definitely saved me a ton of time. I have to finish welding and putting the door bars in but so far so good


Quick paint job before Ford Fest 2019


Fuel System Installation:
Radium with internal pump, swapped to m3 hangar/pump assembly on the saddle tank to feed the surge tank, keeping my existing c5 regulator setup.
Routing is like this!
Lift pump (inside normal tank)-> Suge tank -> regulator -> fuel rail.
Fuel from regulator goes back into surge tank to keep it filled, then overflow from the surge tank goes back into the factory saddle tank setup to complete the circuit.
I'm using the radium quick connect to connect to the m3 assembly. Don't worry I'll be posting a video on how I'm routing it in case anyone wants to do the same.


Console a little more together.

Headlight lens cleaning lol

Welp... Broke the first driveline component yesterday. Going to upgrade to a 1350 next and see how that goes. 
1350 U joint repaired by Shaftmasters in 3 DAYS!! and billet adapter designed by myself and machined by a buddy .(Thanks Brock)
 .
.
New motor mounts underway! Also changing up the header design to more of a longtube style. Rear end is getting tubed as well because of an incident from the end of the season. 
Using 3D printed header modeling cubes to mock up the pipes, this then can be translated directly to actual pieces. Each bend section is 22.5 degrees and matches up perfectly to the bend radius of the tubing purchased from aceraceparts. I'll post more once the collector is delivered and the rest of the pipe routed. This also gave me a chance to fix my header to steering shaft clearance issue I had.

These look SICK

Need to weld them up but test fits are necessary first.


OLD n Busted meet new HOTNESS

Swapped engine mounts out to metal ones.

Had to modify the passenger side header... So I just ended up restarting. I have two pipes tacked, the other two mocked up with 3D print.

Hey guys! Dayco posted an article on myself and a few other guys check it out please! I also completed Drift Indy's street league and placed 8th last weekend out of 32 drivers.
https://www.daycoaftermarket.com/en/...e-drift-teams/ .
.
We have a fuel gauge now finally! Used a Tanks Meter match interface to a Amazon fuel gauge. testing it this weekend.

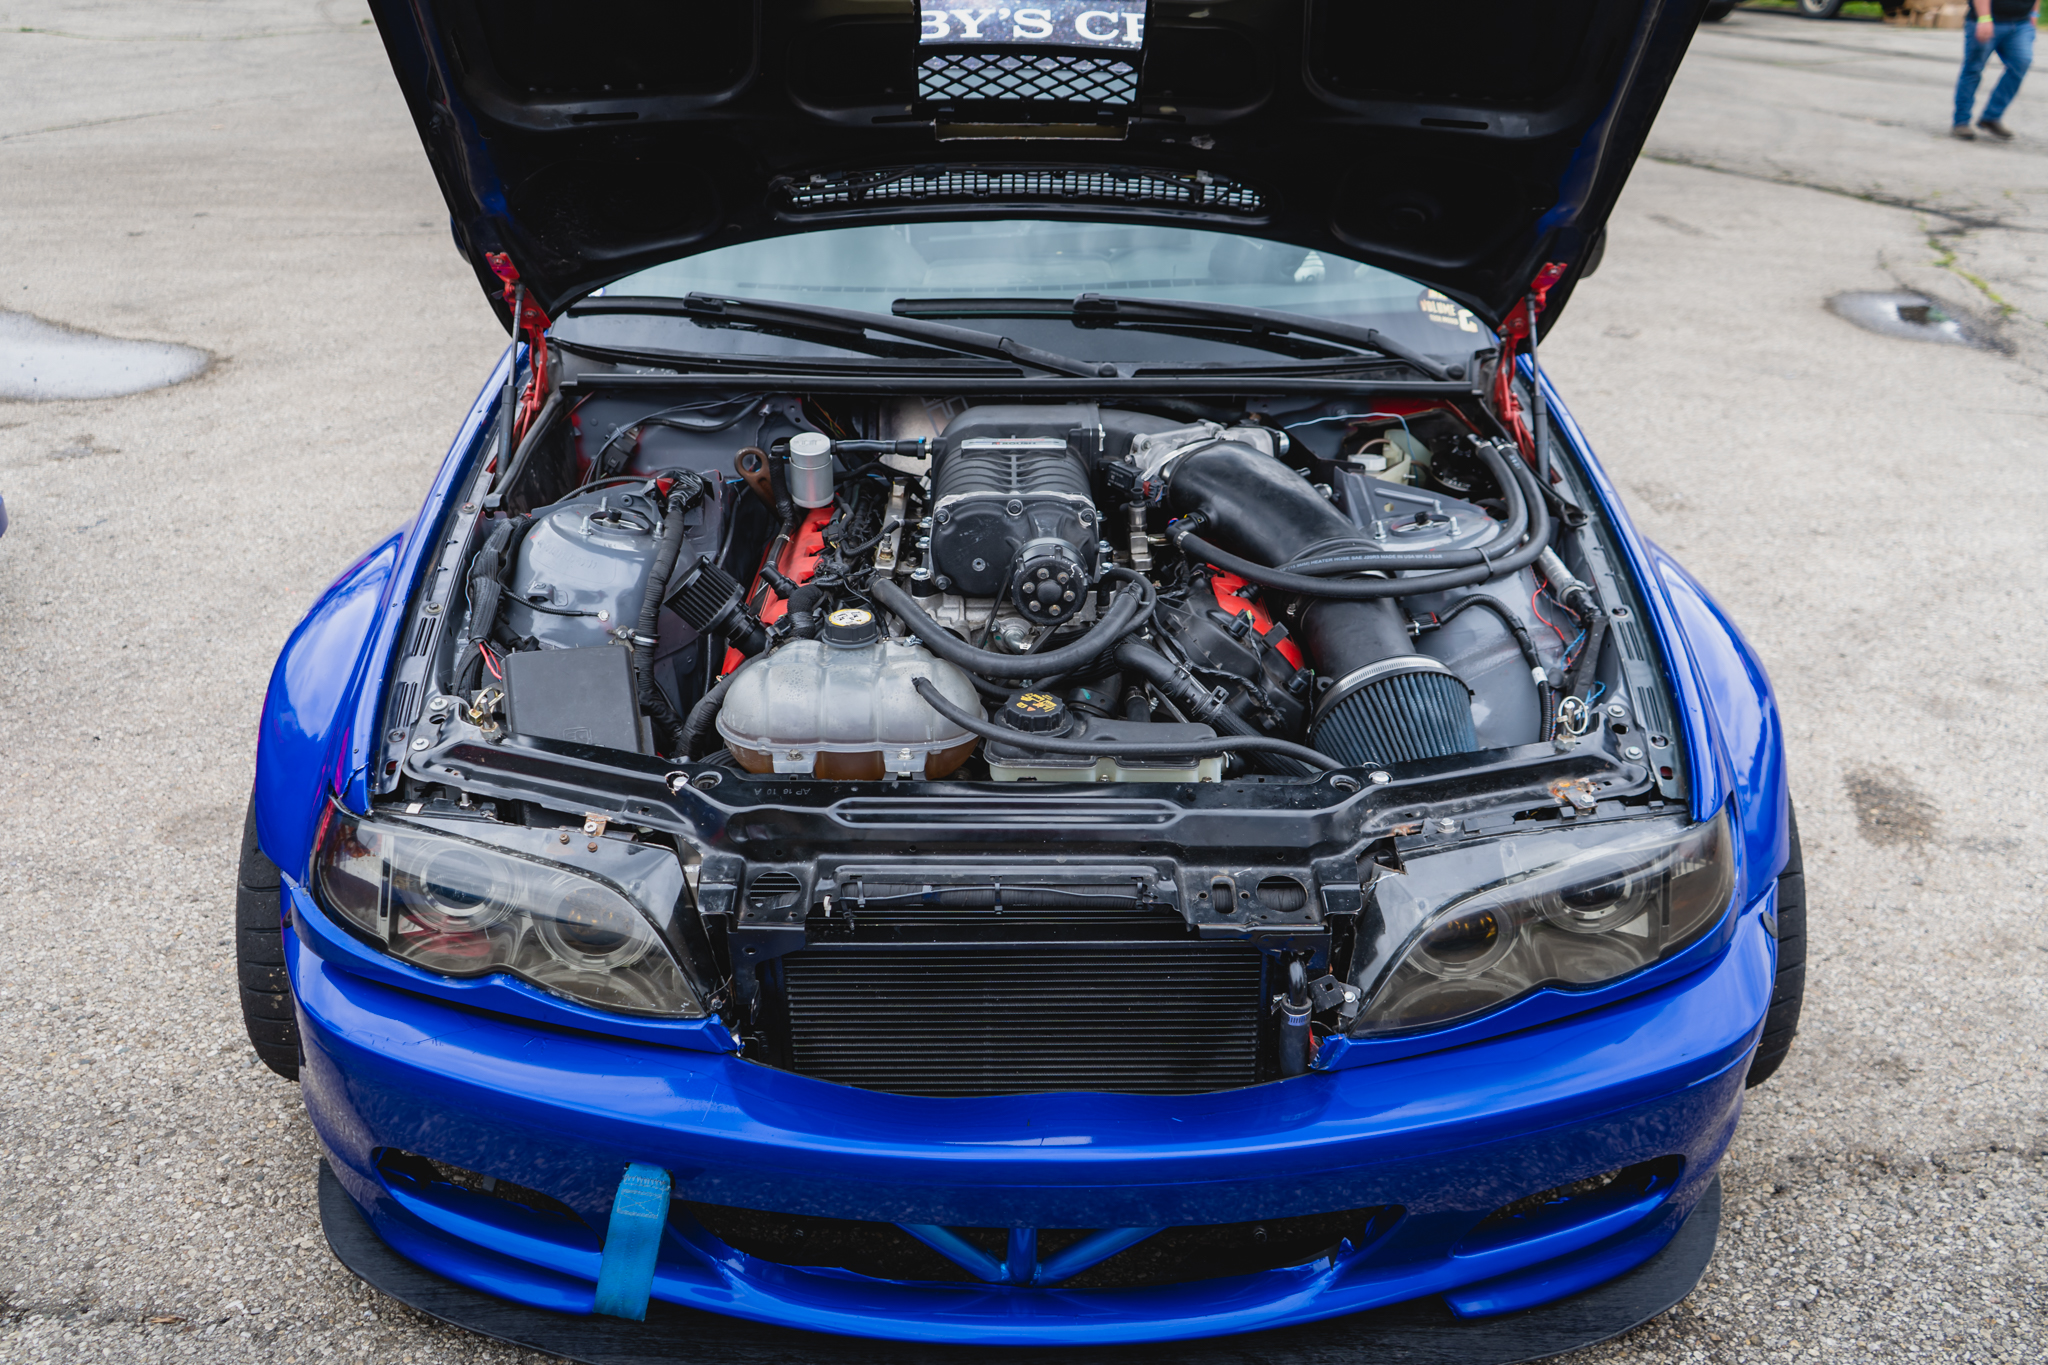
Finished Engine Bay , super tight fit